If you’re anything like us, you’re taking more photos than ever but there’s an important next step which is often overlooked — organizing and archiving.
Google Photos is our favorite solution for storing, organizing, and sharing photos and videos.
It’s easy to use and it’s free, yet many people still don’t know about this useful service. We’re here to help!
This complete guide explains how Google Photos works, how to get started, and lots of tips and tricks for getting the most out of it.
Contents of this Post
Google Photos boasts many excellent features.
Use the menu below to navigate our guide and learn all about Google Photos.
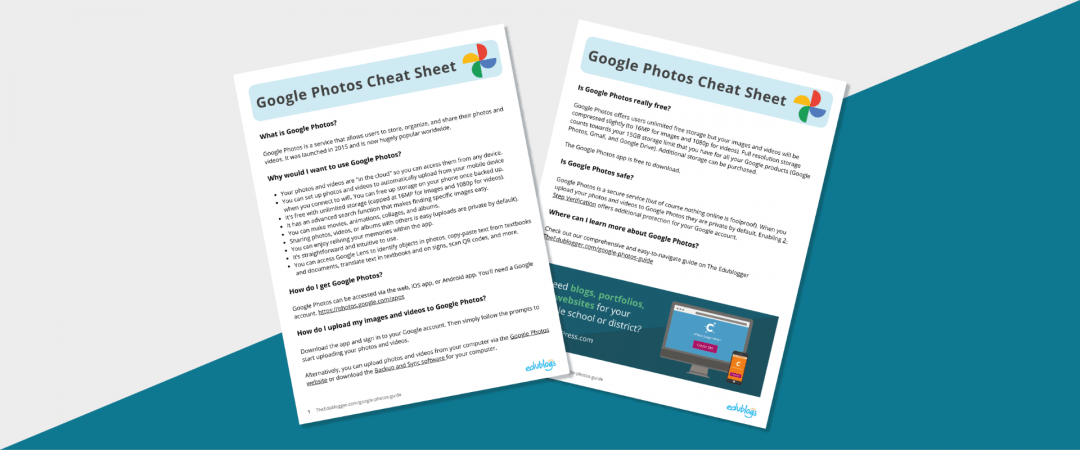
Don’t have time to read the guide? Here is a two page cheat sheet you’re welcome to download and share.
The Basics – What Is Google Photos?
Google Photos is a photo sharing and storage service developed by Google. It was released in 2015 and is now hugely popular worldwide.
Google Photos stores your photos and videos in “the cloud” — this is just tech-talk for online storage.
In the past, you might have plugged your phone or camera into your computer and laboriously transferred all your photos and videos. From there, you might have backed up your computer on an external hard drive.
While extra backups can still be a good idea, especially for important files, storing your photos and videos in the cloud does have many advantages, such as:
- It’s quick and easy — you can set up backups to occur automatically when you’re connected to wifi.
- You can access your photos or videos from any device (phone, tablet, computer) as long as you have internet access.
- Sharing albums, photos, or videos with others is simple.
- Running out of storage on your phone is a thing of the past! Once your photos or videos have been uploaded, you can free up space on your phone.
There are a number of services available where you can store your photos in the cloud but Google Photos is particularly popular. Let’s take a look at why.
The Benefits of Google Photos
These are the main reasons why we consider Google Photos the best cloud storage service going around:
- You get unlimited storage for free. You can pay if you want your photos stored with the original resolution but you’ll probably find the standard high quality free version is fine. (Images over 16MP are compressed to size, and videos are capped at 1080p resolution). We explain storage more later on.
- It’s packed with numerous features to organize, use, share, and manage photos and videos.
- It works on all devices seamlessly.
- You don’t need to be overly tech-savvy to use Google Photos. It’s fairly intuitive and straightforward to navigate.
- Other people don’t need to have Google Photos to be able to view the content you share with them (sharing is optional; your content is private by default).
- You can archive photos that you want to keep, but don’t necessarily want to revisit like screenshots or receipts (find out more about archiving).
- It’s easy to find a specific photo. You don’t need to remember the date the photo was taken. You can search by someone’s name, an event, objects, places, text in a photo, or even a map.
- You can make movies, animations, collages, and albums to save, share, or embed.
- You can access Google Lens to identify objects in photos, copy-paste text from textbooks and documents, translate text in textbooks and on signs, scan QR codes, and more.
- You can relive your favorite memories within the app (a very popular feature).
Google Photos has become more than just an app to manage your photos, it’s become the home for your life’s memories.
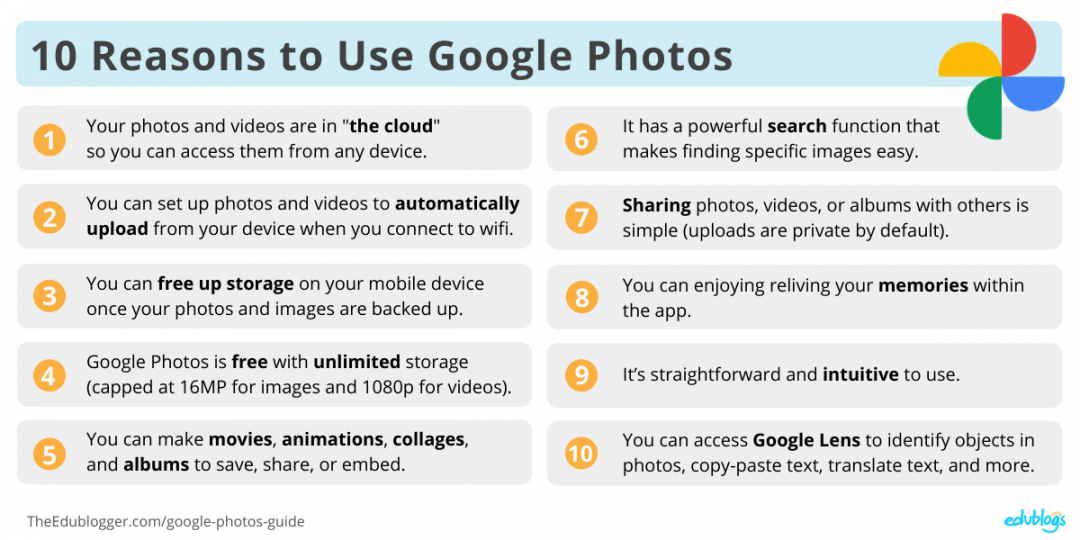
Here’s a summary of why we recommend Google Photos. Feel free to share this summary graphic with others!
How to get Started with Google Photos
Getting started with Google Photos is simple:
- Download the free app from the iOS App Store or Google Play Store.
- Open the app and sign in to your Google account. Chances are, you’ll already have a Google account (such as Gmail). If not, it’s quick and easy to sign up.
- Once you’re signed in, you simply follow the prompts to start uploading your photos and videos. Be prepared: this can take a while if you have a lot of images and videos. Make sure you’re connected to wifi if you don’t want to waste your mobile data.
👉 There’s also a web version of Google Photos for uploading pictures and videos that are stored on your computer. You can view and share images and videos via the web version but the app is better for exploring memories or creating movies.
How to View Your Photos and Videos
To view your uploaded photos and videos, you simply open the app or visit the Google Photos website from any device.
Go to https://photos.google.com on the web, or tap on the Photos tab in your app to view all your photos sorted in order of date uploaded.
The great thing about Google Photos is it doesn’t matter if you use multiple devices; as long as you’re signed in to your Google account you’ll be able to access your photos and videos.
Navigating the Google Photos App
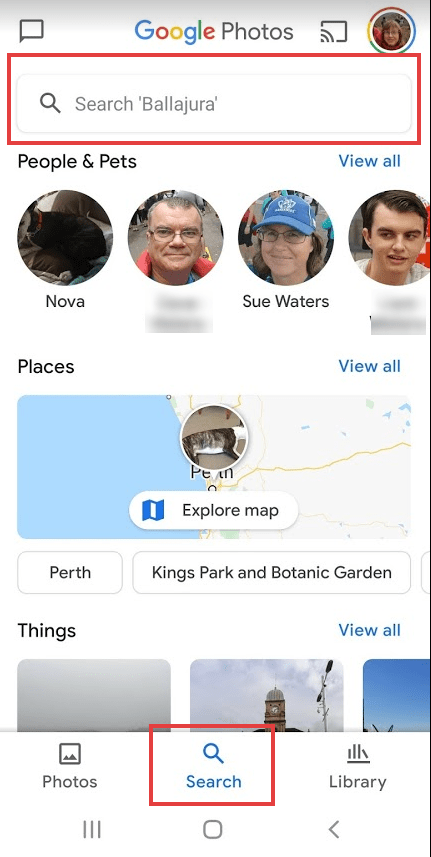
The Google Photos app has three main tabs at the bottom: Photos, Search, and Library.

You’ll notice the app looks ever so slightly different depending on whether you’re using an iPhone/iPad or Android device.
Let’s take a closer look.
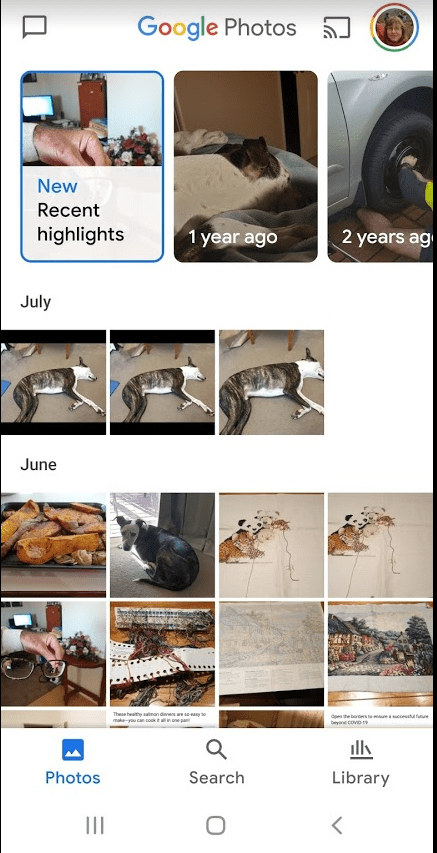
The first tab is Photos. This is where you see your past Memories and most recent photos.
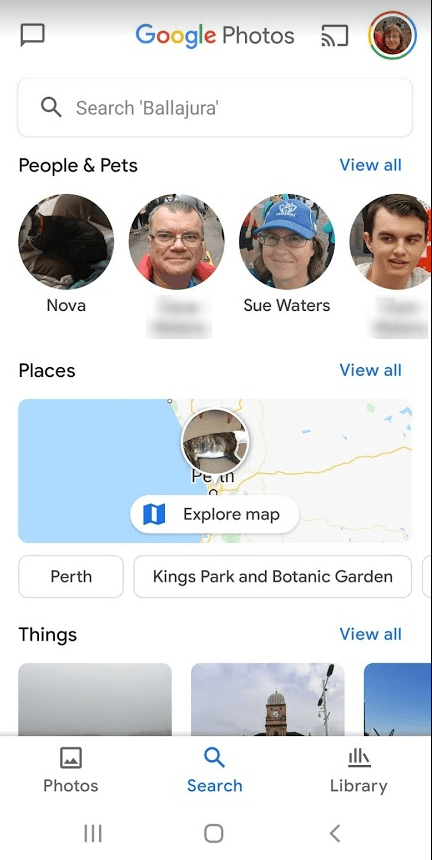
The next tab is Search. This is where you can look for your photos by person, category, map, or things. You can also view your creations: animations, collages, and movies.
The third tab is Library. Here you’ll find your Albums, Favorites, Archives, and Trash. You can also make animations, collages, and movies through the Utilities option.

You view an individual photo by tapping on it. This is also how you access the options for editing and sharing a photo.
The image below explains what all the icons on a photo mean.
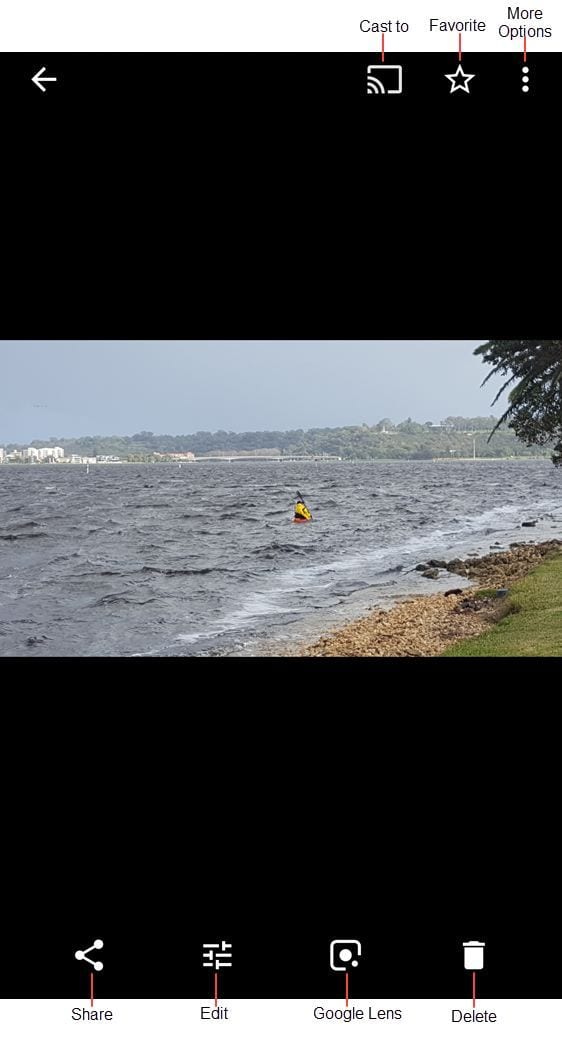
This is what the icons surrounding an individual photo mean:
- Cast to: Allows you to stream your photos from your phone to your TV using Chromecast. If you don’t have a Chromecast, you won’t see this icon.
- Favorite: Adds the photo to your favorites folder.
- More Options: Lets you add to album, archive, delete, and edit photo information. You can also open the image in Snapseed which is a photo editing app.
- Share: Used to easily share a photo with others. The icon looks a little different on iPhone/iPad but is in the same position as the image above.
- Edit: Used to apply filters to your photos; adjust light, color, or pop; rotate or crop the photo. If you want more complex photo editing tools you’d go to More Options (…) and then Open in Snapseed.
- Google Lens: Image recognition software designed to bring up relevant information using visual analysis. We explain this tool more further on.
Backup And Sync in the Google Photos App
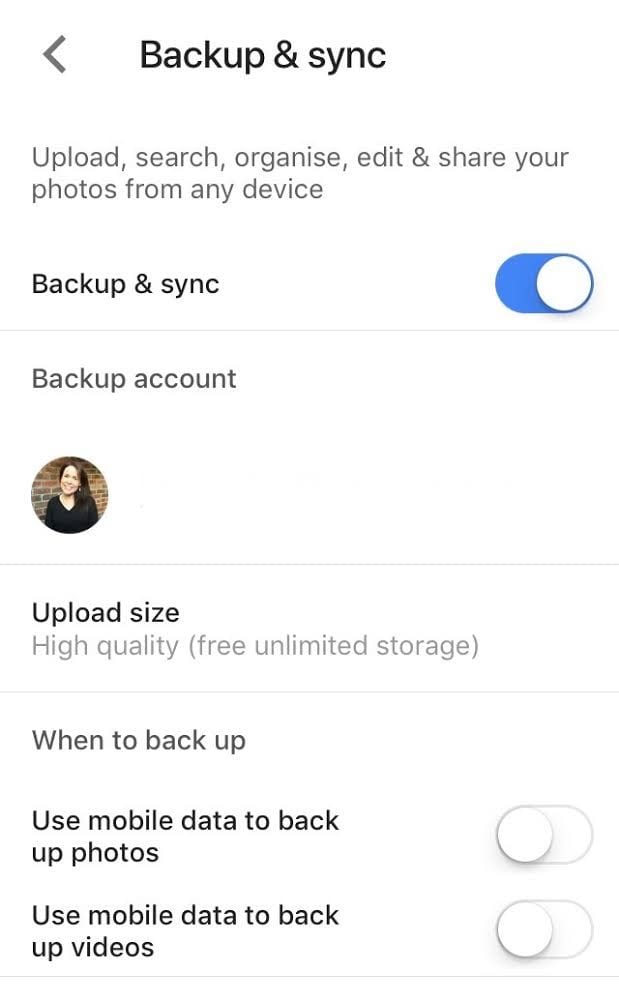
If you take photos on your phone, the easiest way to get them to your Google Photos account is via backup and sync.
My phone is set to automatically upload my photos to Google Photos when I’m connected to wifi. It’s a good idea to make sure this setting is turned on if you have a limited data plan on your phone (so you don’t waste all your mobile data).
To turn on the wifi backup setting:
- Open your Google Photos app and tap on your profile image (or initial) in the upper right corner of the app.
- Tap Photos settings (the gear icon).
- The first option is Backup & sync. Toggle to activate backup & sync.
- Make sure the two options at the bottom of the screen, “Use cellular/mobile data to back up photos” and “Use cellular/mobile data to back up videos” are turned off.
Google Photos Search
Google Photos Search
Google Photos uses complex techniques to analyze and group photos which make its search very accurate and powerful!
You can search for people, pets, places, things, text, and more. You can type in search terms like “tennis”, “Sydney”, “Mike birthday”, “carrot cake recipe”, “Charlotte wedding” or anything else that springs to mind. You can have multiple search terms too like “2016 summer Steven picnic”.
What makes all these search options great is you don’t need to remember the specific date or even any specific details of the photo you’re looking for.
To find a specific image in Google Photos:
1. Click or tap on the Search tab at the bottom of the Google Photos app (or use the search bar on the web).
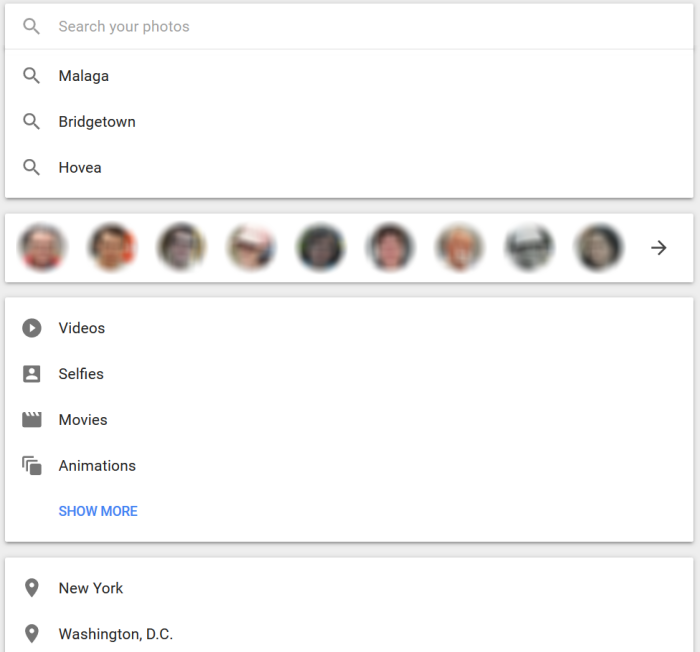
2. When you start typing in your search, suggestions will pop up like recent searches, people you’ve named, location and so on.
3. When you enter your search term you’ll see all the options which you can then scroll through and select.

Naming People and Pets
If you use Google Photos a lot, it can be very helpful to name your friends and family. You can also give pets a name!
When you click on a photo of a person or pet at the top of the Search tab, it pulls up any photo you’ve uploaded to Google Photos with them in.
👉 Want pets included? Go to Photo settings > Group similar faces in your app and turn on Show pets with people.
You can name the faces of people for easy future searching too. This is how you do it:
1. In the Search tab of your app, you’ll see faces of people (or pets) who show up in a lot of your photos.
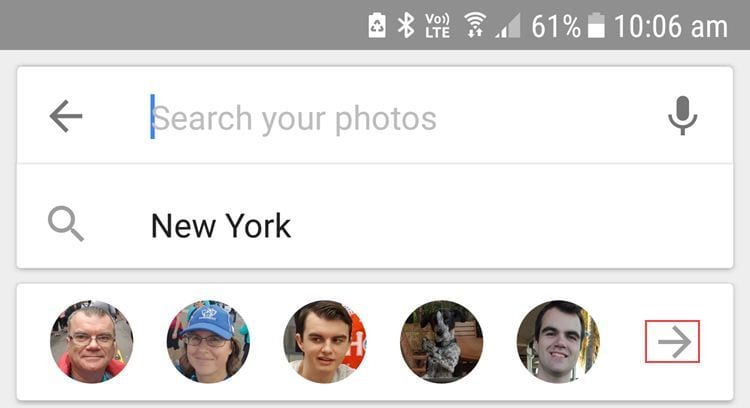
2. Tap on the photo of the person or pet you want to name.
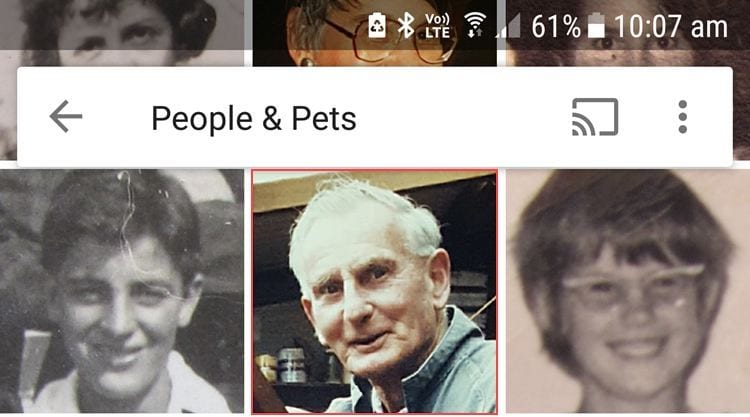
3. Tap on Add a Name.
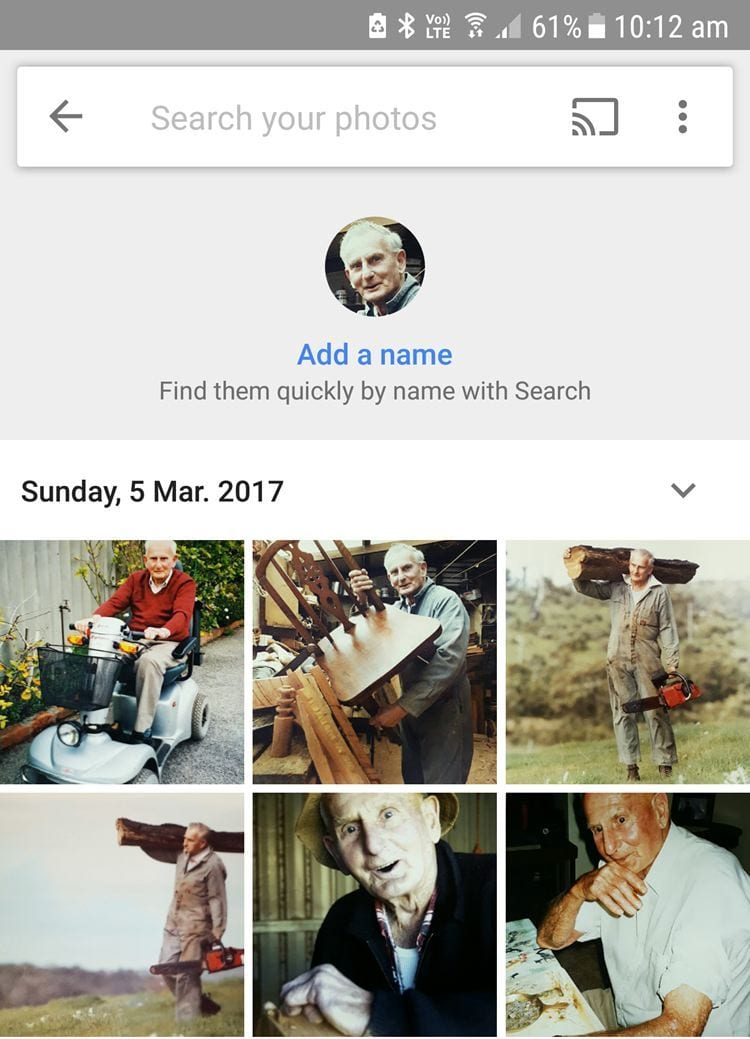
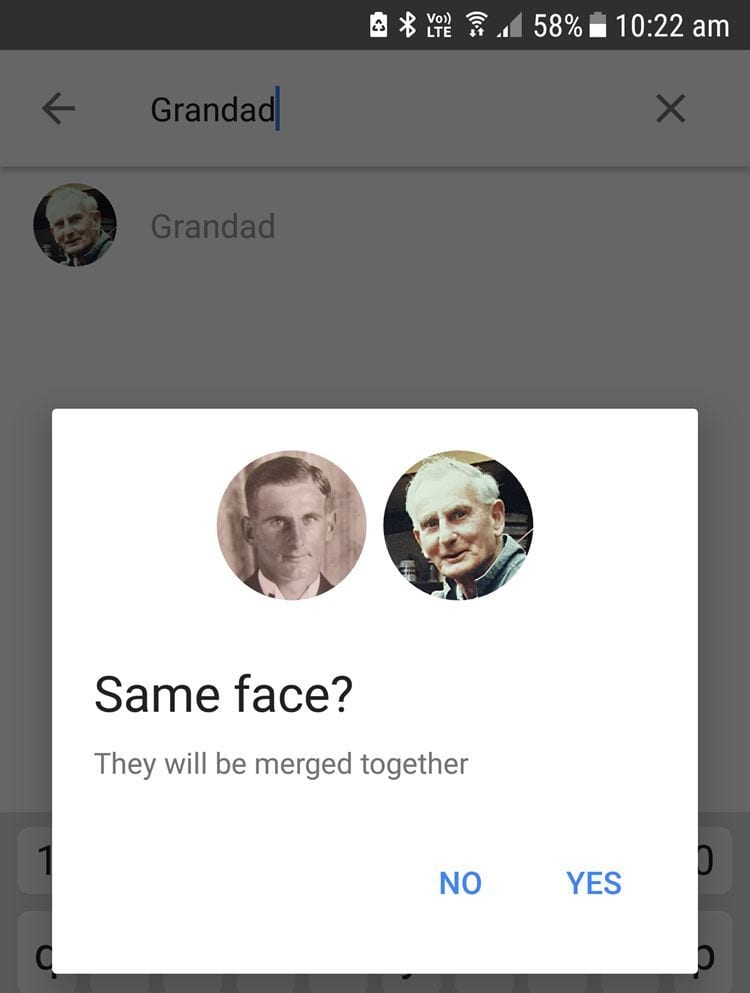
4. Type their name and tap Done if it’s a new name.

Or select from an existing list of names if it matches an existing name you’ve already created. Then tap Yes for merge.
Google Photos Memories
Memories is a feature that was added to Google Photos in 2019 and due to its popularity, it became a main feature of the app in mid-2020.
Memories are collections of some of your best photos and videos from the past. Memories are available on Android devices, iPhones, and iPad (not on the web version).
Only you can see your Memories unless you choose to share them.
To access your Memories, simply go to your Photos tab in your app. Memories are displayed in a carousel above the grid of your most recent photos.
Tapping on a preview for a year opens up your memories of photos and videos.
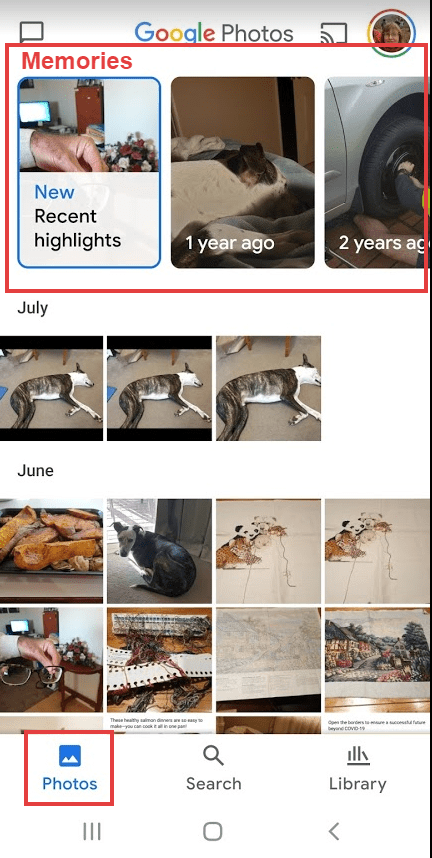
You can select the types of Memories you want to see in Settings:
- At the top right of the app, tap your account profile photo or initial and then Photo settings > Memories.
- From here you can hide particular people, pets, and dates if you don’t want to revisit these memories.
This is section 1 of 3 in the series “A Beginner’s Guide To Google Photos”
- A Beginner’s Guide To Google Photos – Page 1
- A Beginner’s Guide To Google Photos – Page 2
- A Beginner’s Guide To Google Photos – Page 3


How to send more than one at a time photos.
John
These are some good advice if you want to read about school life and drama read Nikki’s Blog
If I save faces to my photos and I decide to transfer them to my external hat drive, do they save like tat too. Also can I drag one folder to another
My biggest question for Google Drive, and/or Amazon. When your phone syncs to either of these and you delete (say “pic1”) off your phone, is it still on the Drive ? And vice versa ?
I have a symbol I don’t see here on some of the photos in my Photo Gallery.
It’s a dotted circle with an upwards arrow inside it. It’s in the bottom right corner.
Can someone let me know what this means.
Thanks
I have personally never used Google Photos, but would definitely like to try after reading this post! Thank you for sharing!
I have personally never used Google Photos, but I definitely would like to try after reading this post! Thank you for the information!
What an informative article! MANY of the commenters have unanswered questions that reflect similar inquiries on my part. Could you please update or at the very least reply to your readers? I find that out of all these helpful, how-to, tutorial type blogs/articles I read, it’s so RARE for the writer to come back around every week to answer questions. It’s frustrating. We wind up here because inevitably we had a question that brought each of us here. PLEASE help, you would more than likely win with quite a few people and maybe just maybe make someone’s day!
In your post you refer to a helpful article. What article are you referring to? Is there a link available? Thanks
This is amazingly helpful and exactly what I’ve been looking for for ages, thank you so much. I never realised compressed quality photos were free. I’ve now selected this options which is great. However, I already had over half of my storage used where I’d been using the original quality option. How do I make it so that all my existing photos on there are compressed quality not original quality, it seems to have only done it going forward?
Thank you for providing extra benifits of Google photos. The movies , animation and collages features save me from paid playstore editing apps. The sharing feature also does its best providing all the sharing options through phone apps. The memory feature helped me to refrest those old beautiful moments. But unfortunately, google currently allows only 15gb free storage and one has to get a premium membership to use the cloud upto 100gb. Other than that, the editing tools like magic eraser is most favorite of mine.
Thanks for the info!
Google’s photos will not allow me to make any more albums. Is there a limit on how many you can have? I only have about 10 to 12 of them.
Second question is when I go into g photos it sometimes shows three or four of the same photo! It even shows photos that I deleted while on my camera. How do I delete them? I also want to delete all of my medical downloads that I screenshot that’s in there. Taking up space!
To bad google pics doesn’t have a setting to only auto save people or documents to the cloud unless done manually? Also duplicate photo button & then delete! Sounds so simple but no one
has it!
If you have photos in one album is there any way to drag them over to a different album? I can’t for the life of me find any video or tutorial that tells me how to do this
I’ve found that if I choose the photos I want to move by hard press then go to the 3 dots upper right corner it gives me the option to add to an album. Then you can delete them from the first if so desired.
I like this post, it is fun and informational.
Super interactive and fun looking, not hard to eyes and is simple for any person of any age.
I am digitizing my old prints and slides spanning 50 years. I saw your notes on Google Scan, but I have an Epson Scanner and Silverfast SE8 software and the images are on my Macbook and I created a “test area” with a subset of photos on a Google Photos desktop instance. I have about 10 shoe size boxes full of old prints I am scanning in 6 to 8 at a time… They are going to basic “finder” folders I am naming, much like albums…
I have not turned on the automatic backup or feed from my phone, iPad or Mac because I have a well organized “album” structure in iPhotos. I am hoping to leverage those “albums” and “upload” them into the Google Photos structure and I am trying to find out if that can be done in a “utility” manner. Also, if I have “seeded” Google Photos with photos that have “people” named, can these utility batches make the People connection for these old photos being loaded?
Any help with how to get these photos from two sources (computer folders and iPhoto app) uploaded and leverage as many Google Photos features I can would be greatly appreciated!
What a great tutorial! I only recently have had the time to really learn what to do with my photos and there are thousands of them on my laptop. Now I have the guidance I need and can start organizing sharing and printing my pictures. Thanks so much.
CONGRATULATIONS: Kudos to you for what may be one of the best instructional websites ever created! Your presentation and clarity is much appreciated.
SUGGESTION: Many of the comments being posted by others are also useful and some reveal a need for you to 1) update the site, or 2) point the commenter to the section which already has the requested information, or 3) re-phrase the comment so that it can be answered by you rather than saying you don’t provide assistance on specific queries. This all takes time, but does serve your readers well.
LABELS: It seems like many users of Google Photos don’t understand how Google is managing their photos. It seems like their system is the same that is used in Gmail with the use of labels or tags. Only one copy is stored in Google’s server, but labels are attached to each file as needed to indicate where is can be accessed. The label for the “main” or gallery area isn’t displayed since it is the default. If a photo is assigned to an album, then an “album” label is added, but the main label is not deleted. If a photo is deleted from an album, the tag is simply removed, but the photo itself is still there with it’s “main” label. Archiving a photo, however, adds the archive label, and removes the “main” label. Again, only one actual copy of the photo exists on the Google server. Please correct me if I’m wrong.
DRAWING: I would love to see a diagram or sketch that shows which tools/apps have to be used to manage my photos. Our household has two PC’s, three Android tablets, and two Android phones, divided into two Google accounts. Functions to cover in the diagram are uploading, downloading, viewing photos on each device, viewing all photos stored online, deleting from online, deleting from each device, which app does which of these tasks, etc.
PHOTO FOLDERS: Many of us have created directories with folders and subfolders as needed to manage our large collections. For example, I have scanned a folder of slides taken in the first year of a daughter’s life. I want to keep that set together online for security, to share with others, and to pass on to others when I’m gone. Google photos doesn’t maintain folders, but tries to re-create them as albums. Is there an alternate app or method to satisfy my needs, other than using a thumb drive or external drive? Covering this on your site would be useful to us, since Google Photos is missing this feature.
this was very strong and in detailed and really helps explain how to work the app and get around to everything. You gave alot of good tips and advice which i find very useful.
thanks for the tips i love taking phots and this might help a lot