Feeling frustrated because you want to embed Jing screencasts into your blog posts but can’t get them to work because they’re too BIG? Join the club we all feel the same way. But there is a work around for embedding Jing into your posts — let me show you how!
Skill level: Medium to Advanced
About Jing
Jing is a free program, by TechSmith, which you can use to instantly capture and share images (with notes if you like) and videos from your computer to anywhere. You can also share these images and screencasts free online at screencast.com. Check out their video tour to learn more about Jing and how to use.
People like using Jing because:
- It’s very easy to use
- It’s easy to share images and screencasts
- It creates superior quality screencasts – doesn’t change or diminish the resolution of your content like some screencast applications will. You can easily record the entire desktop and viewers will still be able to read the text in the screencast.
Embedding Jing
Unfortunately Jings video size is based on your original recording size i.e. if you recorded your entire desktop its size may be 1024 wide by 756. So when you grab the embed code from screencast.com it will be too large to embed in your blog posts and editing the code doesn’t work.
A work around, courtesy of James Farmer, is upload your Jing screencasts to your blog, create an image and link to their file location (this is how James does it for the Edublogs video tutorials).
Here is how you do it:
- Create your screencast using Jing and save it on your computer.
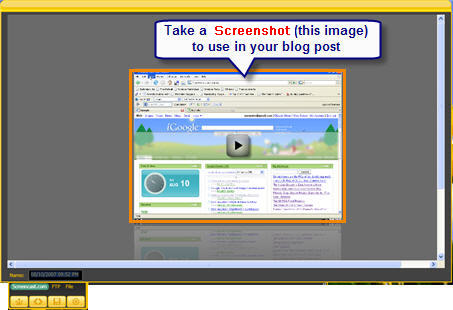
- Take a screenshot of the your screencast preview to use in your blog post.
- On your blog dashboard, go to Write > Post
- Write your blog post
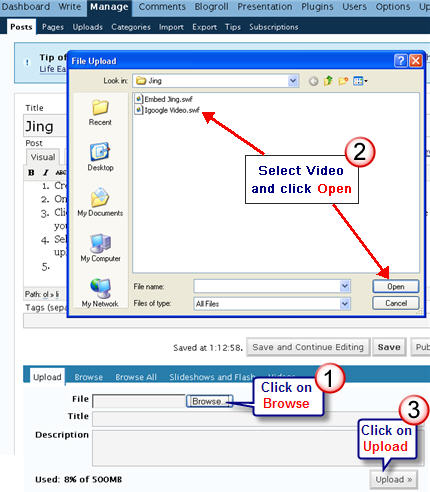
- Upload your Jing Video to your blog post by clicking on Browse and navigating to the area of your computer that has the Jing video file you wish to upload.
- Select the video you want to upload and click open. Be patient –will take time to upload depending on size i.e. several minutes.
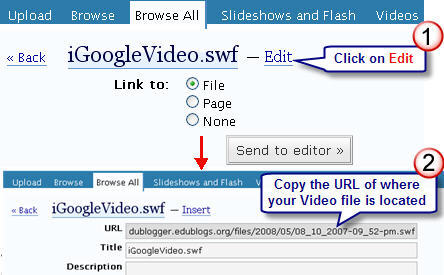
- Click on Edit then copy the URL location of your file.
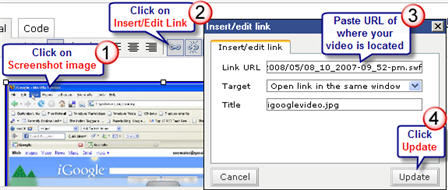
- Upload your screenshot to your post and then link your video to your screenshot by pasting URL location of your file.
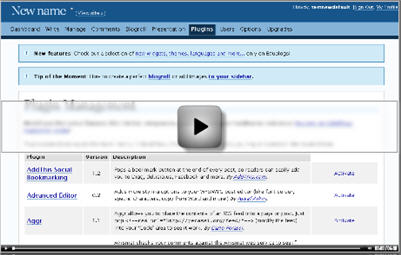
Here is an example of what it looks like and how it works using Edublogs 5 minute video tutorial on playing with your plugins.
Please note:
- Maximum upload size of videos to Edublogs is 20 MB.
- Get extra storage space and benefits by becoming an Edublogs supporter for $25 per year.
- You can also link your screenshot to your file hosted on screencast.com
FINAL THOUGHTS
What can I say? Well it’s not a prefect solution because it isn’t exactly an embed and the simpler solution would have been to link to your file on screencast.com. But the reality is most don’t want to do that so this at least makes it look nicer. Personally I wish that Jing would provide an easy option to create suitable embed code for our blog posts when we embed across from screencast.com.
Do you use Jing? And if so, what do you use it for? Or do you use another screencast program? If so, what do you use and why?
If you are enjoying reading this blog, please consider ![]() Subscribing For Free!
Subscribing For Free!
28 thoughts on “Embedding Jing Screencasts Into Blog Posts”