This is a guest post from Stef Galvin.

Stef is a Year One teacher from Melbourne, Australia.
Her class blog is called Room 10 Wonderland and her professional blog is Little Bookish Teacher.
Stef spends her free time making and uploading videos to two YouTube channels (Noveltea Corner for books and craft videos, and the recently started Little Bookish Teacher for teaching videos). She also loves reading a lot of books.
Stef has been blogging, in various forms, for over fifteen years, and loves connecting with people on Twitter.
The old phrase “first impressions count” is very true in all areas, including when it comes to your blog. A blog doesn’t have to look very fancy– but there are ways to dress it up to make it appealing to visitors that are quick and easy (and free!).
This tutorial will focus on using PowerPoint to create a simple header image for your WordPress/Edublogs/CampusPress blog that will draw your visitors’ eyes.
Before You Begin
Many of the Edublogs themes allow you to add a custom header image. However, before you start, you might want to check if your theme allows this.
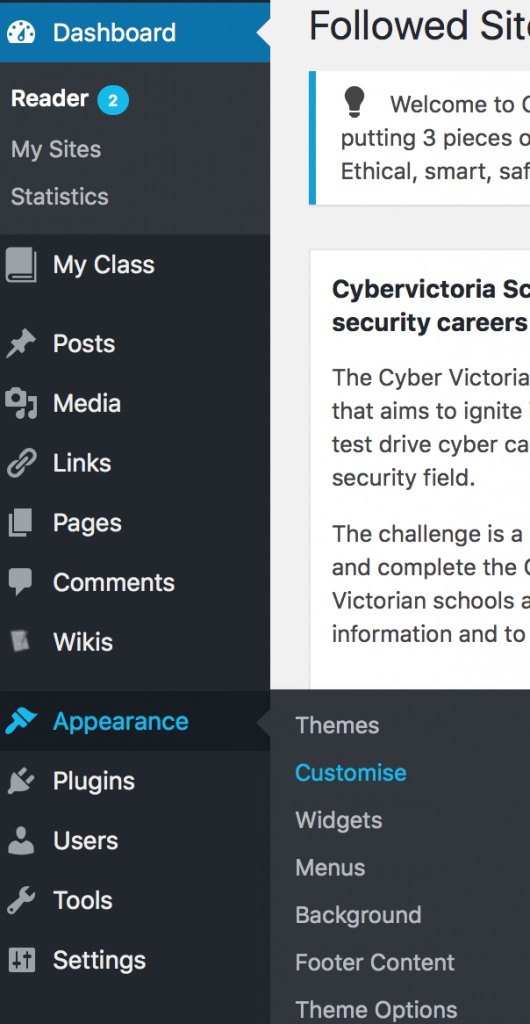
Go to Appearance > Customize in your dashboard.
Click on Header Image in the Customizer to reveal the theme’s header options.
- If you don’t see the Header section in the Customizer it means the theme doesn’t support the use of a custom header image.
A Word On Tools And Operating Systems
While I’m using a Mac computer and PowerPoint Version 15.4, you’ll find the Windows variations to the steps listed where necessary. Adjust the steps to best match your tools.
If you have access to image editing software and you’re comfortable using it, you can skip the PowerPoint steps and create your image and then follow the upload process.
Step One: Find An Image
Remember to keep in line with copyright rules and find an image that either you have taken yourself or one with an appropriate Creative Commons license available.
For this demonstration, I have used Unsplash and found an image by Mike Fox.
 Some other great sites to find free images include Pixabay and Pexels.
Step Two: Find Your Dimensions
Knowing the dimensions of your header image will make it a lot easier to customize your header from the outset.
Simply log in to your dashboard and go Appearance > Customize
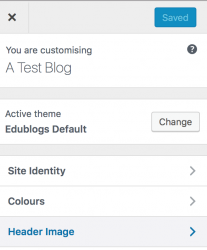
 Once you reach the Customize screen, click on Header Image
You will find the dimensions for your header image in pixels.
We’ll need to convert the pixels to centimetres (or inches) in PowerPoint so make sure you note down the pixels and use a converter, like Unit Conversion, to help you out.
If all you want is an image without any additional text, you can simply upload your image here and crop it by following the prompts on screen. If you want to customise it further, follow on to the next step.
A Word On Text
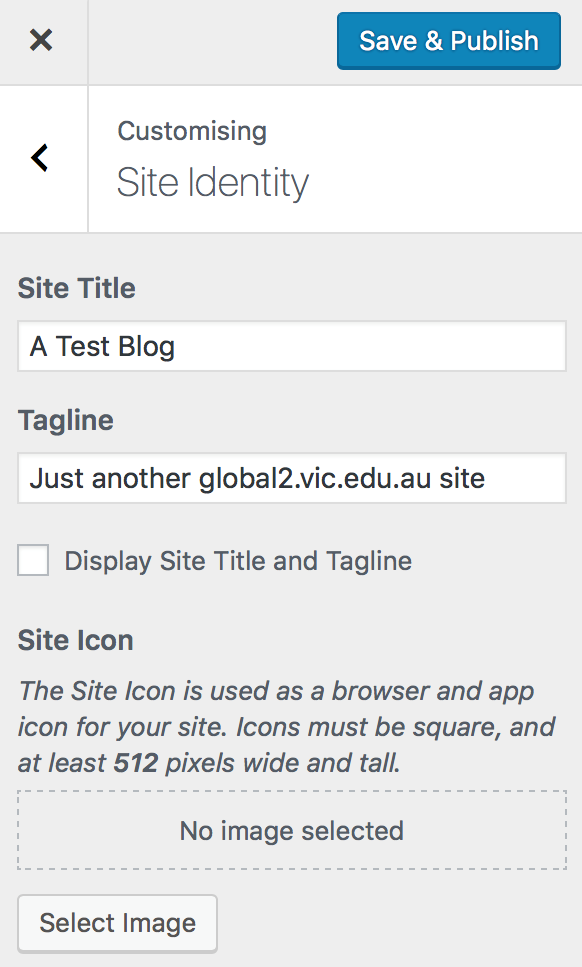
If you are planning to add text to your header image, you’ll also need to go to Customizing Site Identity and make sure you de-select the option Display Site Title and Tagline for a cleaner look.
Step Three: Open A Blank PowerPoint Document
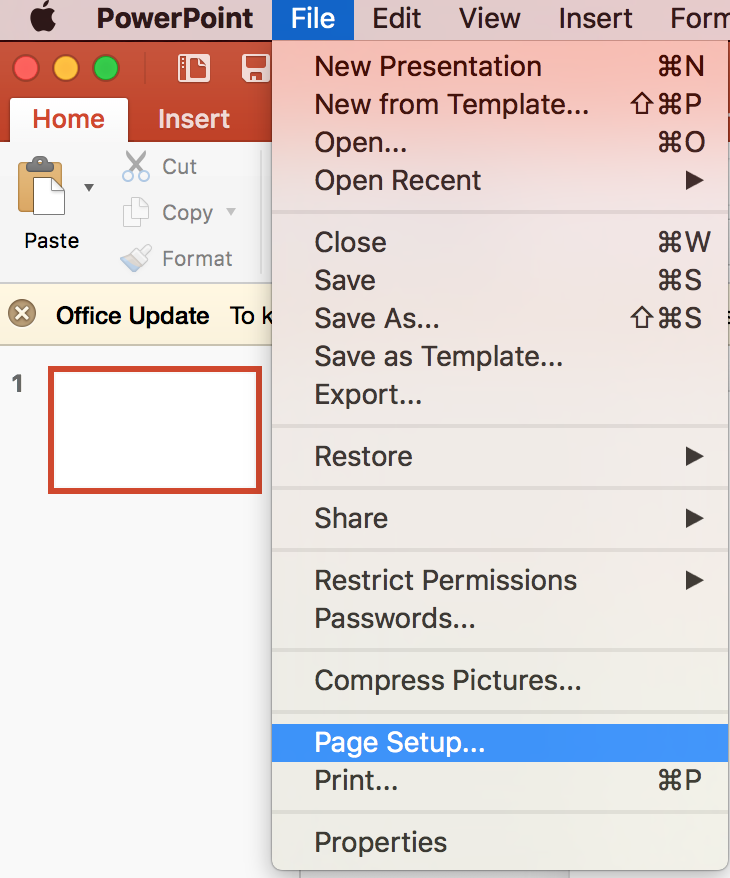
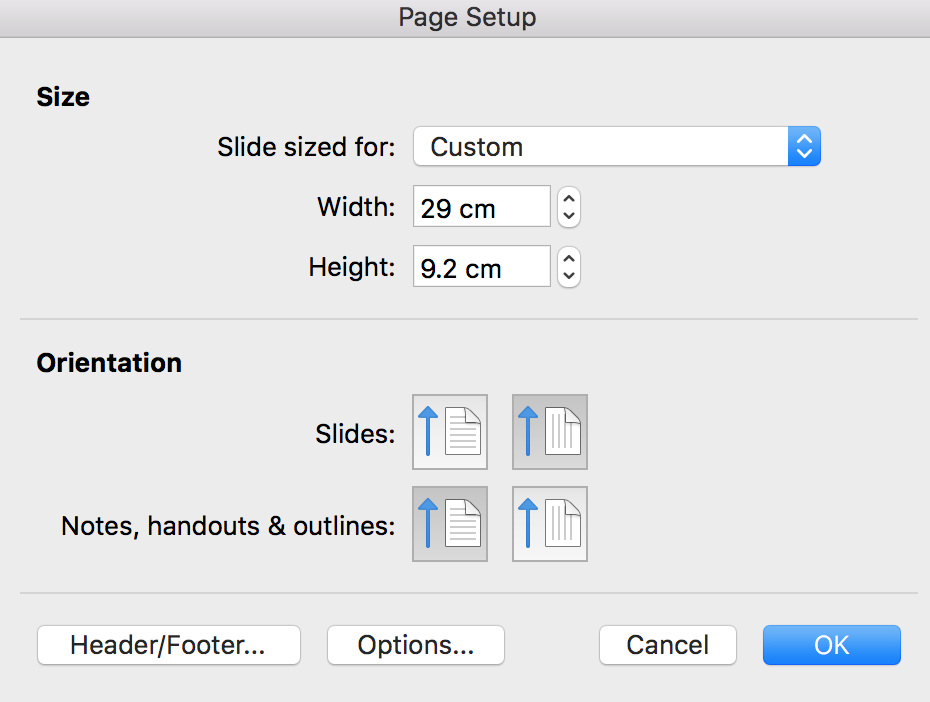
Once you have your blank document open, we need to change the dimensions of the slide by clicking File > Page Setup
Note: On a Windows computer you will go to Design > Slide Size > Custom Slide Size
In the page settings, you will need to type in your converted pixels to cm dimensions.
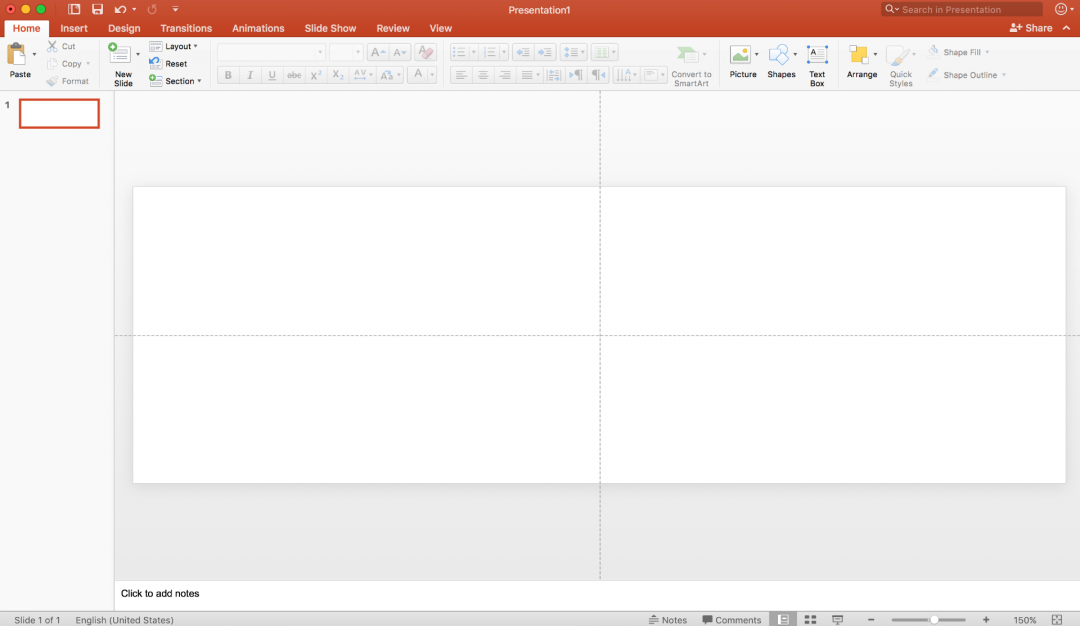
Once you hit OK, your slide dimensions will be adjusted and you now have a blank canvas to work with!
Step Four: Insert Your Image
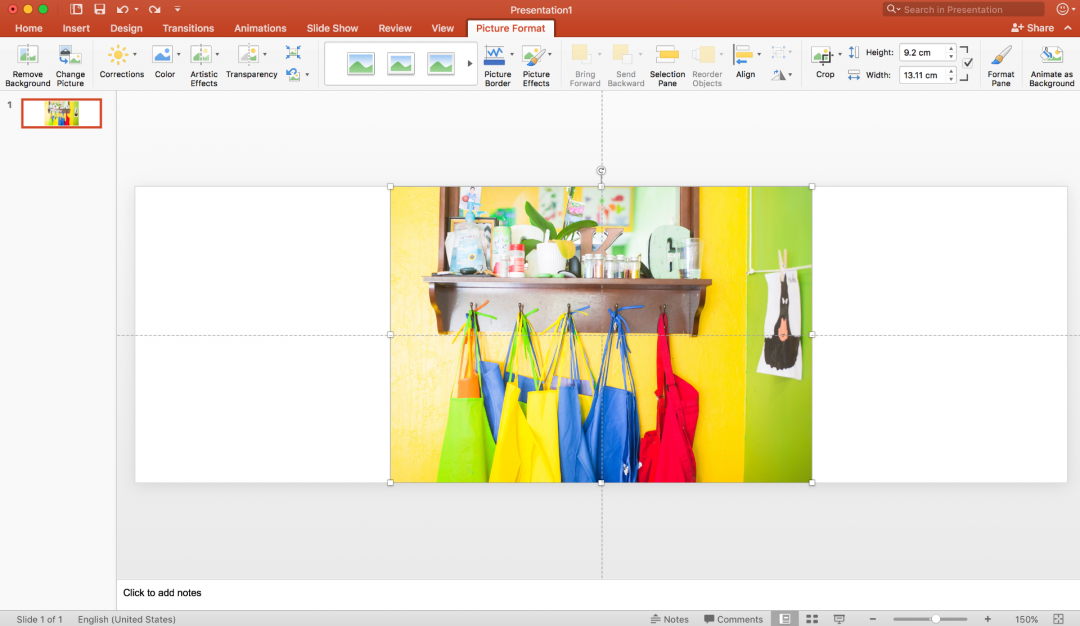
This is where we really get to have some fun. Drag your image file from wherever it is located on your computer onto the blank slide. Alternatively, go to Insert > Pictures
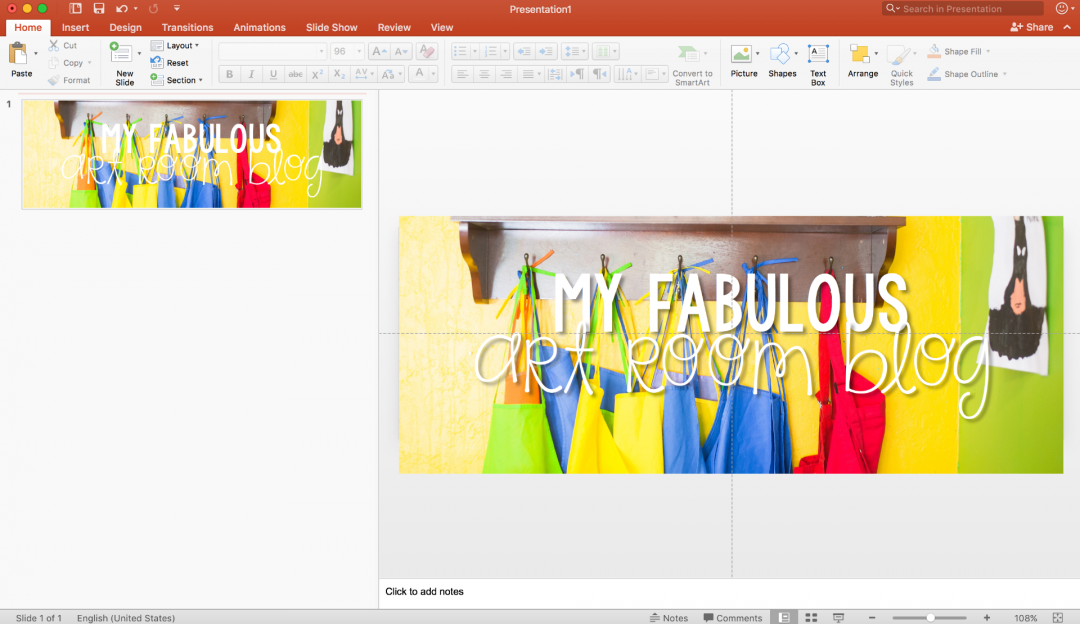
Adjust the size so that the picture fills the whole slide, and move it around.
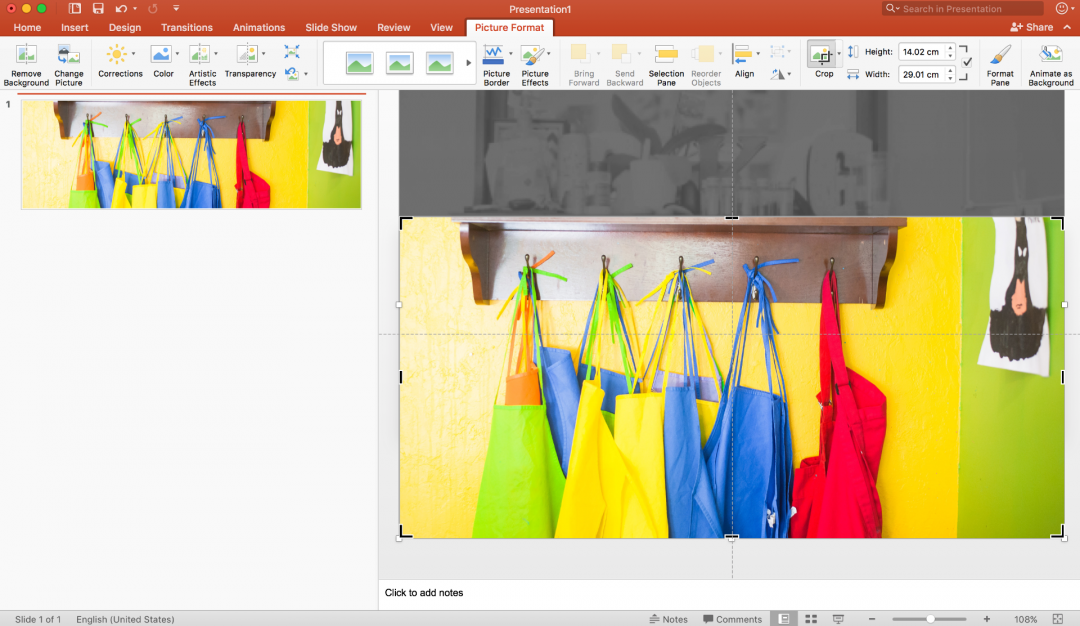
Tip 1: Image Crop
The image is likely to go off the edges, so use the Image Crop button in the menu to keep things manageable!
Tip 2: Slide Viewer
Increase the width of your slide viewer on the left-hand side. This will show you which part of the image is in frame and you can adjust on screen.
Step Five: Add Text
The next step is to add text (if you want to).
I love adding titles– and sometimes all I have is text, rather than images. Get creative!
Because we’re working PowerPoint, we’re using text boxes which means it’s very easy to add, edit, and move around the title.
Just go to Insert > Text Box then draw your text box. Type in your text and choose the font, size, and colour you’re after.
Once you’re happy with how it looks (again, check the slide viewer on the left if you’re unsure) we’re ready to save our image.
Step Six: Save Your Image
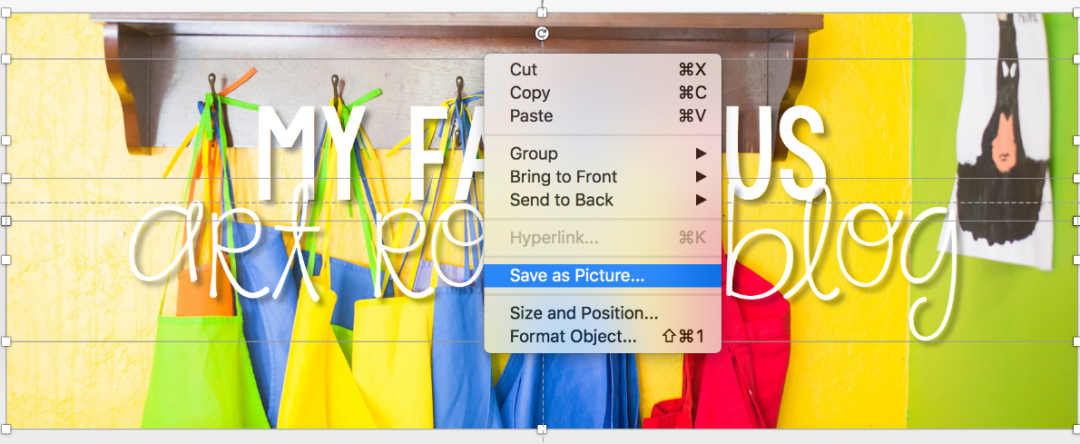
The easiest way to get a high quality image is to highlight the entire slide (just click and drag your cursor over the whole screen). Right click and select Save as Picture. Follow the prompts to save your image.
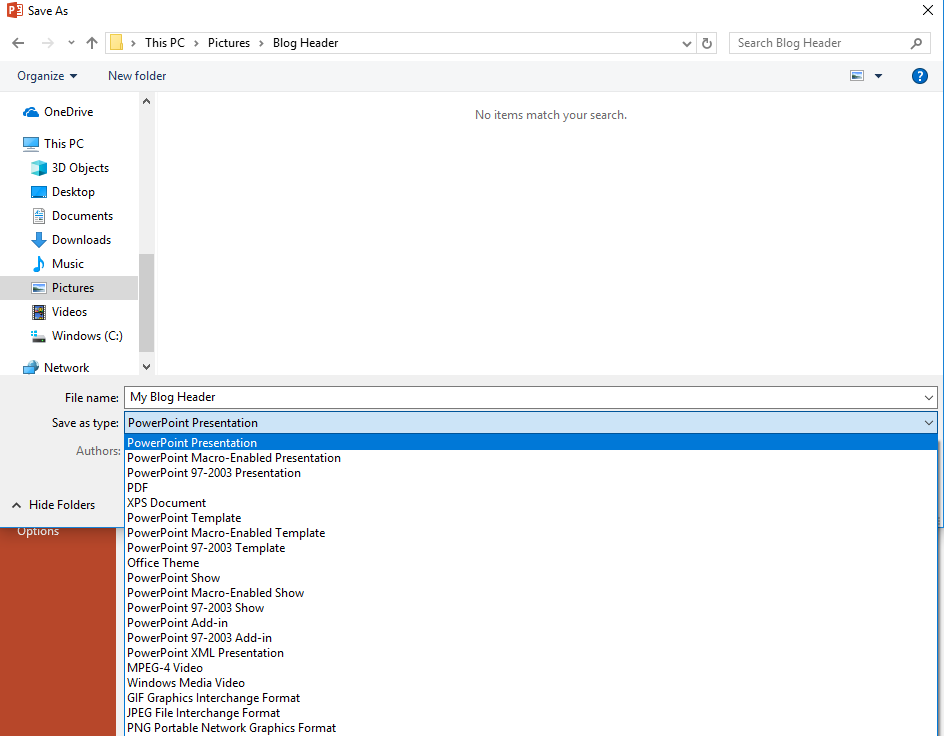
In Windows go to Save As and choose to save your header as a JPEG or PNG image.
Step Seven: Upload Your Image
This is when we go back into our blog’s dashboard to our Customize Header Image screen.
Click on Upload and select your image file.
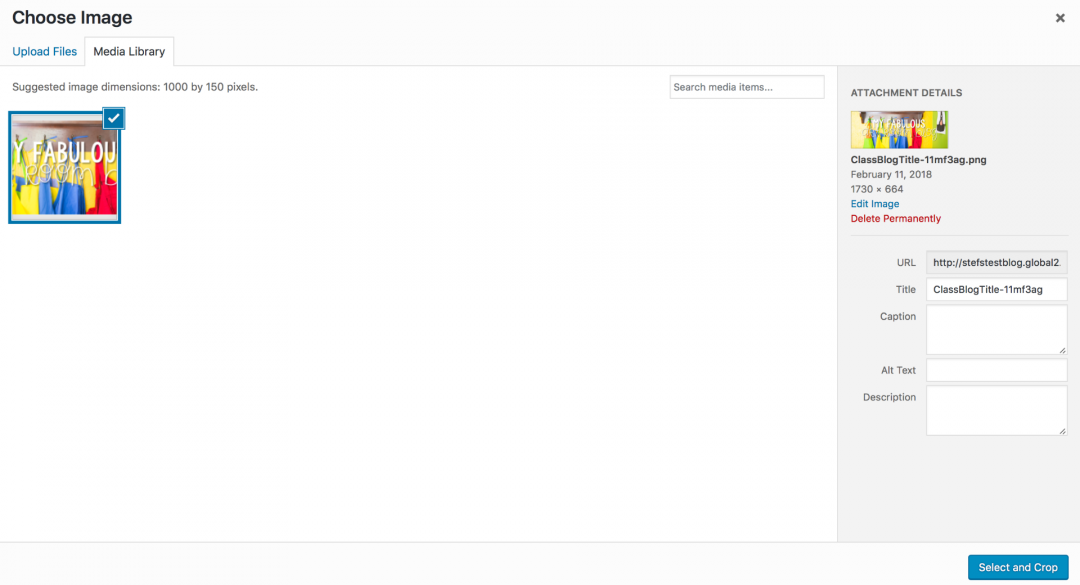
Let the file upload, select it, and then click on the blue button that says Select and Crop.
Depending on how accurate your dimensions were in PowerPoint, you may need to adjust your header a little bit on the screen, but once you’re happy with it, hit Crop Image.
If the image looks pixelated, you may need to go back into PowerPoint and adjust the slide size again.
Remember: It’s okay to play around with it until it looks right; don’t be discouraged!
All that’s left to do is hit Save & Publish at the top of your screen and your new header image is all ready to go!
Don’t forget to save your original PowerPoint file (as a PowerPoint file, not an image) in case you ever want to change your header in the future.
We thank Stef for sharing this fabulous tutorial with us.
Leave a comment and let us know if you have any further questions.
We’d also love you to share the URL of your blog to show off your header. Perhaps you could share a blog with a header that you admire too.
Do you have any other tips on creating headers? Let us know!















Very nice
very helpful tips to make your blog banner perfect
Thank you
Good blog about a very usefull information i love reading your blogs truly practical
i love your post 😀
useful information
Thanks for the idea and I wish I can see it
I love that Idea. I wish I can see it
Is there a version of this for students who use Chromebooks and need to use Google Slides rather than PowerPoint?
Hi Carly,
Good question! You can use either Google Slides or Google Drawings on your Chromebooks.
The instructions are the same for both options.
If you go to file > page setup > custom you can enter the dimensions you need (check in this post to see where to find the dimensions for your blog theme).
You can then play around with the design or text.
When you’re done, go to file > download as > PNG or JPEG
Then upload it to your blog as per the instructions in the post.
Does this help? 🙂
Yes, thank you. I have also introduced students to Canva.com for creating headers. It makes finding images very easy since they are already free. It also provides a template to make drag and drop or replace super simple.
Terima Kasih …
Kembali 🙂
I like your steps and tips it is really good