 Voki speaking avatars are cool and lots of fun to create.
Vokis are used to add a human element to blogs or engage readers.
But they can be a bit pesky to embed in a blog so this post explains how to add a voki to your blog sidebar.
About Vokis
Voki enables you to create an avatar in your own voice using a talking character.
You can customize your Voki to look like you or take on the identity of different characters such as animals, monsters.
Here’s ideas for using Vokis in your classroom (courtesy Helen Otway – Classroom2.0):
- Students can create avatars that are similar in looks or personalities and record a message that tells about themselves.
- Students can exchange these avatars with e-pals either within their own setting or anywhere in the world.
- Students can generate questions to ask their avatar e-pals.
- ESL (English as a Second Language) students can use the speaking avatars to practice and listen to their speech. They may use the computerised voice first then record their own voice when they feel more comfortable. Writing, reading and pronunciation are all practised.
- Students can create an avatar that resembles a character from a story, add a setting and give it speech. The speech could be from the story or a creative point of view (POV) from the character on an event.
Adding Voki Avatar to Your Blog Sidebar
Voki’s are added to your sidebar using text widgets as follows:
1. Go to Voki
2. Set up a Voki account and then create your own Voki.
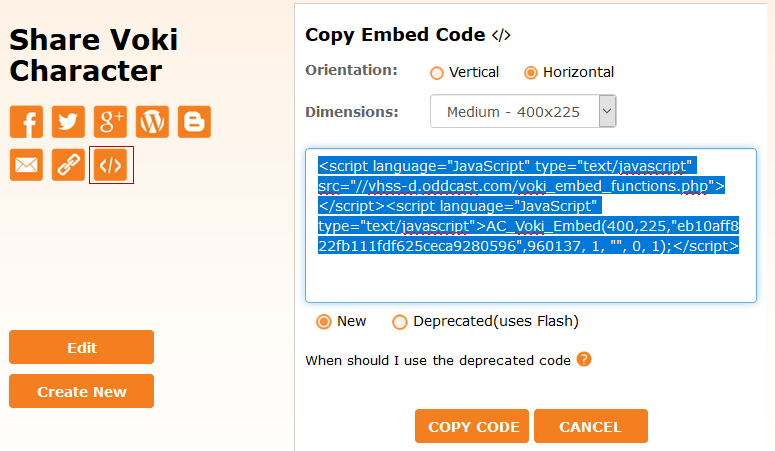
3. Once you have published your Voki grab the embed code (accessed by clicking on the Embed icon in the Share option).
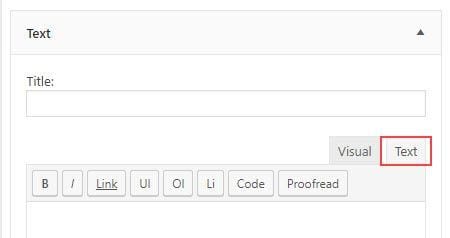
4. Click on the text tab in a text widget in your sidebar.
5. Paste the embed code from Voki in the text widget.
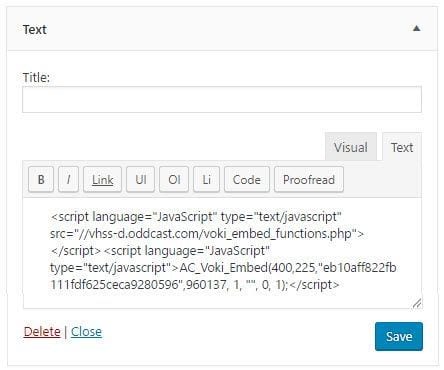
6. Click Save and then Close.
7. You should now see your Voki in your sidebar.
crazy that this was posted the year I was born.
hi thankyou for the side bar i realy enjoy it